Näytetään tekstit, joissa on tunniste book binding tutorial. Näytä kaikki tekstit

maanantai 1. helmikuuta 2021

Tutorial: Mini art journal (in English)


Nämä ohjeet löytyvät suomeksi täältä.

I made myself another mini art journal that is the size of an ATC because the first journal (this one) is filled up already. This small size is currently my favorite. You can make a nice mini page in just 15 minutes and even this short moment of art therapy will help. I originally made a book this size because I find the ATC size very inspiring, and I don't always want to make a card that I would exchange when I already have several cards in stock. And sometimes I just want to keep something, too.

I have been asked several times how I made my own journals and decided to make these instructions. I learned the traditional bookbinding in a course, but the pages in it are too close for my own art journaling. That’s why I made this “looser” binding. I love making my own books and every now and then I try new techniques. I have done many of my books as shown here, also the bigger ones. With the bigger ones I often use old book covers. I like old book covers and as a bonus I get the art journal completed much faster. The cover can be further decorated afterwards if desired.

This is how I make my journals. I find this is quite a simple way to make and art journal. I try to measure as little as possible and I don't take it too seriously if something isn't quite right. 

There are as many other ways as there are makers. I hope you find your own technique.

Materials
  • papers (for the journal pages)
  • paper cutter or similar
  • bone folder or similar
  • ruler
  • pen(cil)
  • thick cardboard (for the cover)
  • thinner cardboard (for the book spine)
  • strong kraft paper (for the cover)
  • paper knife or similar
  • book binding glue or similar
  • paint brush for glueing
  • scissors
  • paper or fabric for the cover
  • bookbinding awl or similar
  • cutting board
  • (clips)
  • bookbinding yarn or similar
  • needle

Step 1: Pages

Start by collecting the right amount of paper for you. In this book, I used wallpaper, an old office folder, and a photo album page. I choose pages that are a bit thicker than the normal copy paper, but not quite the 200 g of watercolor paper. Use whatever you prefer - it's your book.

I use mainly recycled paper as pages because
- it's almost always free
- and therefore there is no pressure to use it for my own art
- the paper already has a history of its own (whether it has been found in the professor's old office, in the pile on the floor of an abandoned room after the office moved, from the recycling center ...)


Step 2 

Cut pieces of paper of suitable size f. ex. with a paper cutter. For this ATC book, I cut 8.9 * 12.8 cm pieces. The papers inside the journal don’t have to be the same size and can be very inspiring to use different sized pages (as I sometimes do, here).


Step 3

Fold the papers in half. I used a bone folder, but you can also use a knife or similar.


Step 4

Divide the pages into signatures. I have three signatures (booklets) and each has four folded papers.


Step 5

Cut and fold one extra sheet of paper for helping in making holes. I often use an old magazine for this.


Step 6

Mark the locations for the holes on the extra paper. This can be done either by measuring with a ruler or by folding. I fold the extra paper first into half. For such a small book, three holes for each signature is enough. I folded the outer edges a little inward (about 1 to 1.5 cm from the edge).


Step 7

Open the paper and mark the locations for the holes.


Step 8: Cover

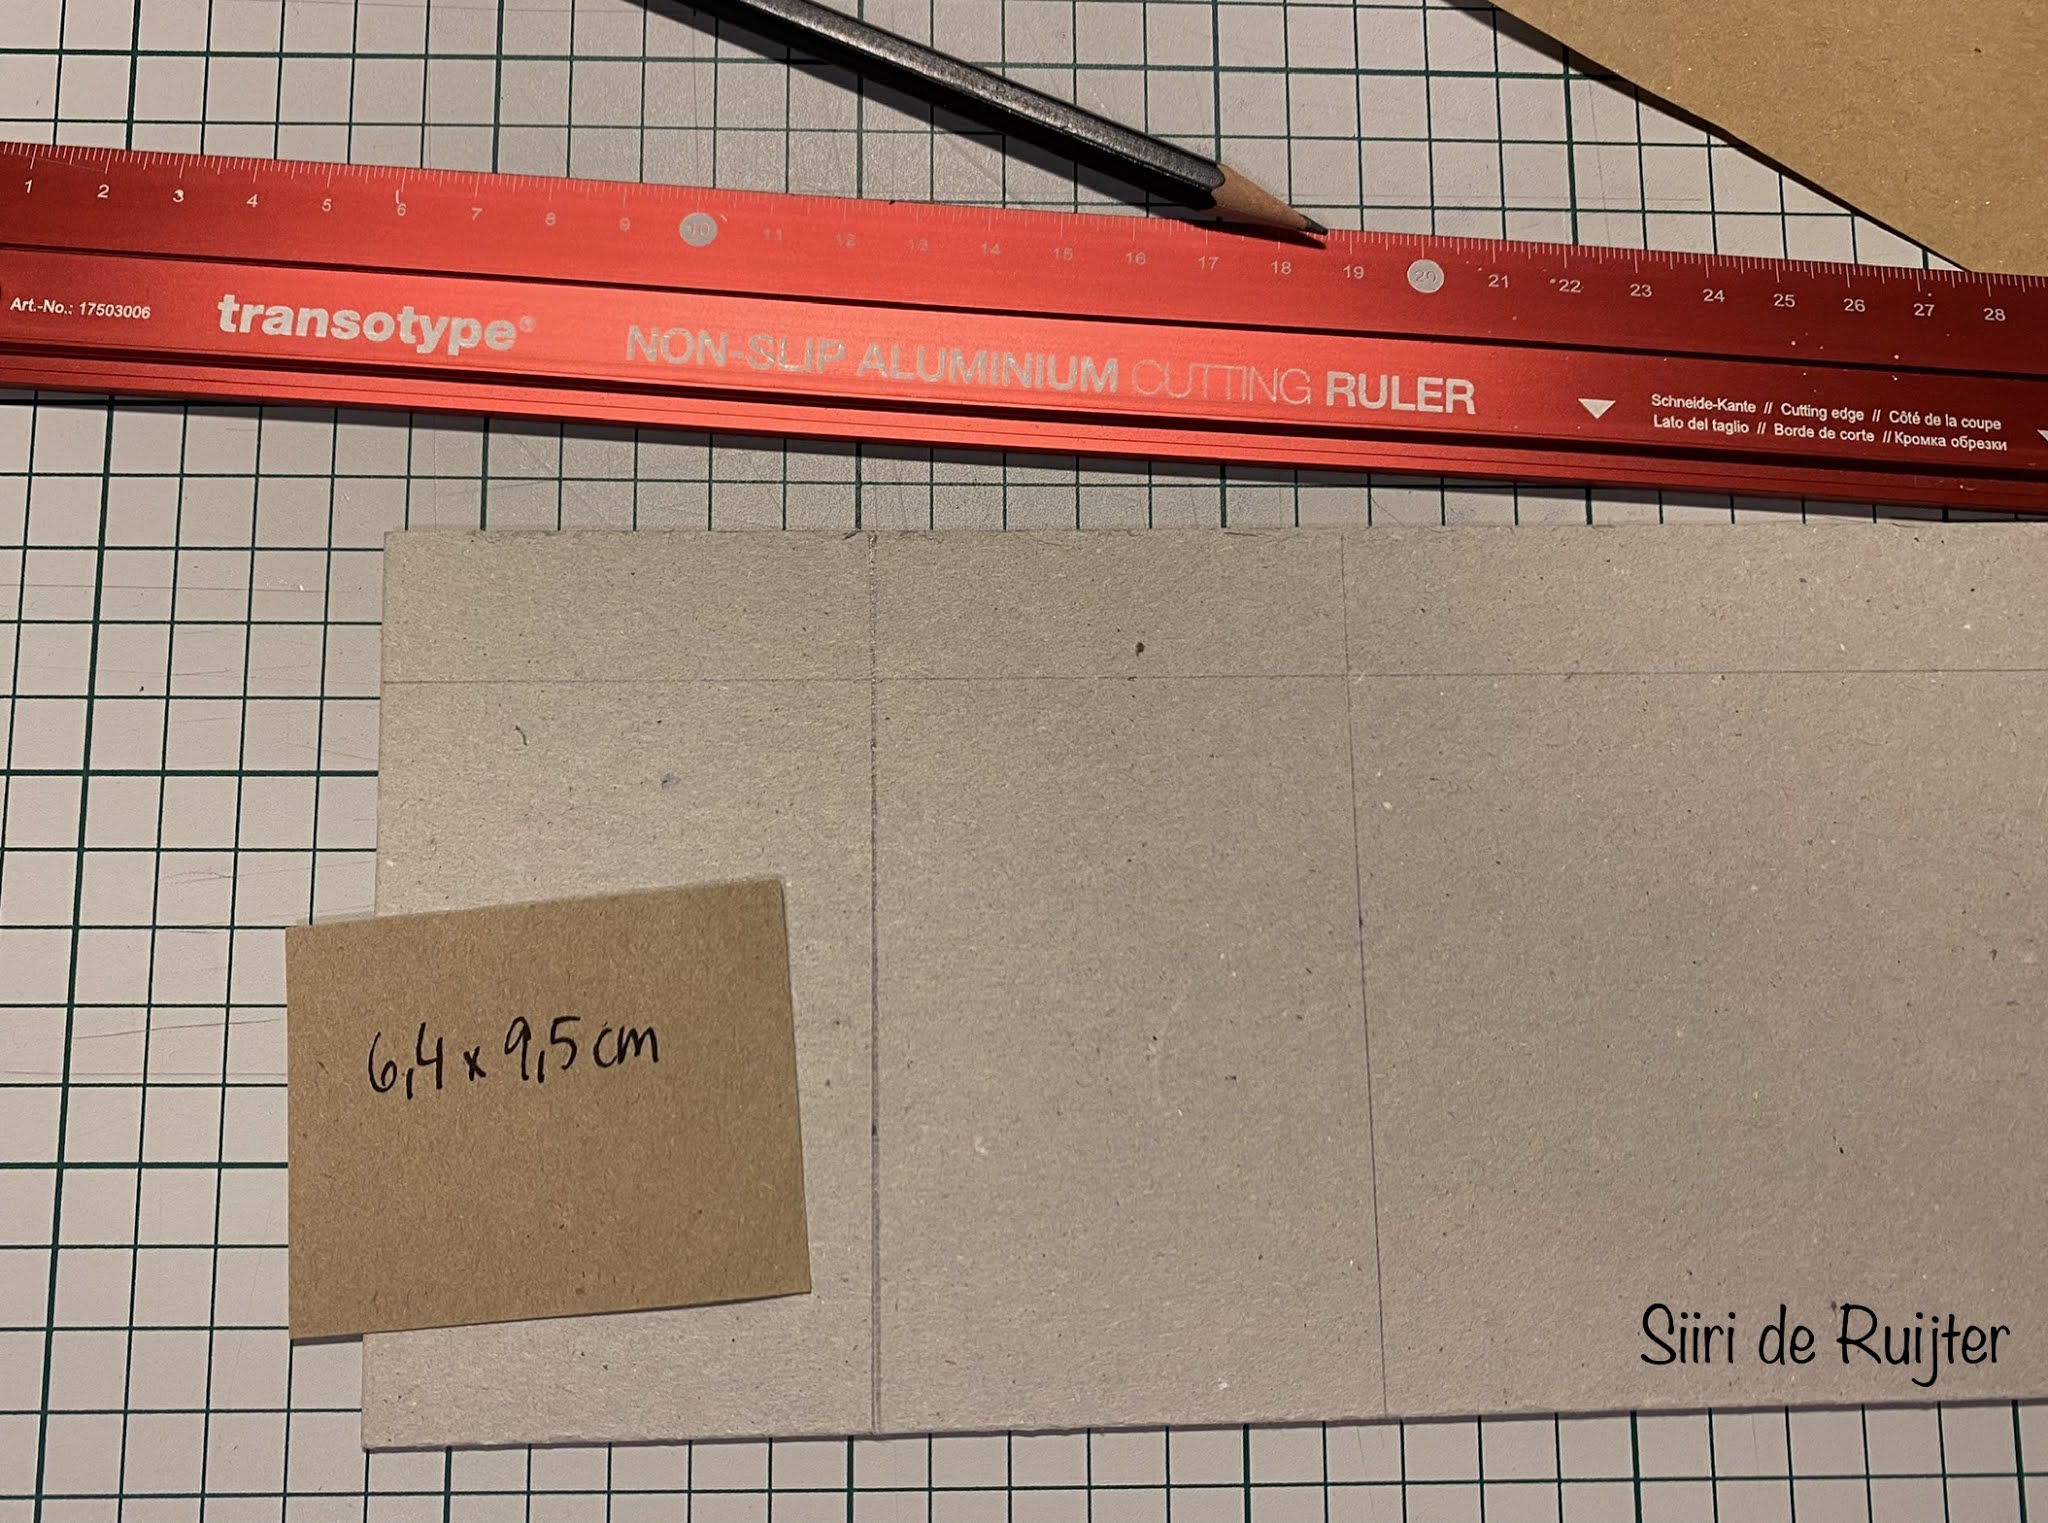
Cut two pieces of 6.4 * 9.5 cm from thick cardboard. I cut my own from 2 mm cardboard with a ruler and a carpet knife / paper knife.

Step 9

Cut a piece of 1.4 * approx. 11 cm piece from thinner cardboard (eg. cereal package cardboard). This is the back of the book and will be shortened later.


Step 10

Cut a piece of strong kraft paper about 6 * 11 cm in size (this will be adjusted in the end). Some other paper is also suitable for this, as long as it does not tear easily. Now you have two thick pieces for the cover, one thin piece for the back of the book, and a piece of kraft paper.


Step 11

Glue the thin piece cut in the previous step to the kraft paper with bookbinding glue. You can also use eg. a more liquid gel medium.


Step 12

Next, the book covers are glued. First, turn the kraft paper around so that the cardboard piece is below. Measure and mark a line 5 mm away from the cardboard piece. Do this on both sides. Put glue until the line and attach the book cover. Turn this over and make sure (for example, with a bone folder) that the paper is firmly attached to the cover without wrinkles. Glue the other side the same way. You can use a ruler (picture below) to help to get the cover to the right position.


Step 13

Now your cover is almost done. The outer side looks like this.


And the inside like this.


Step 14

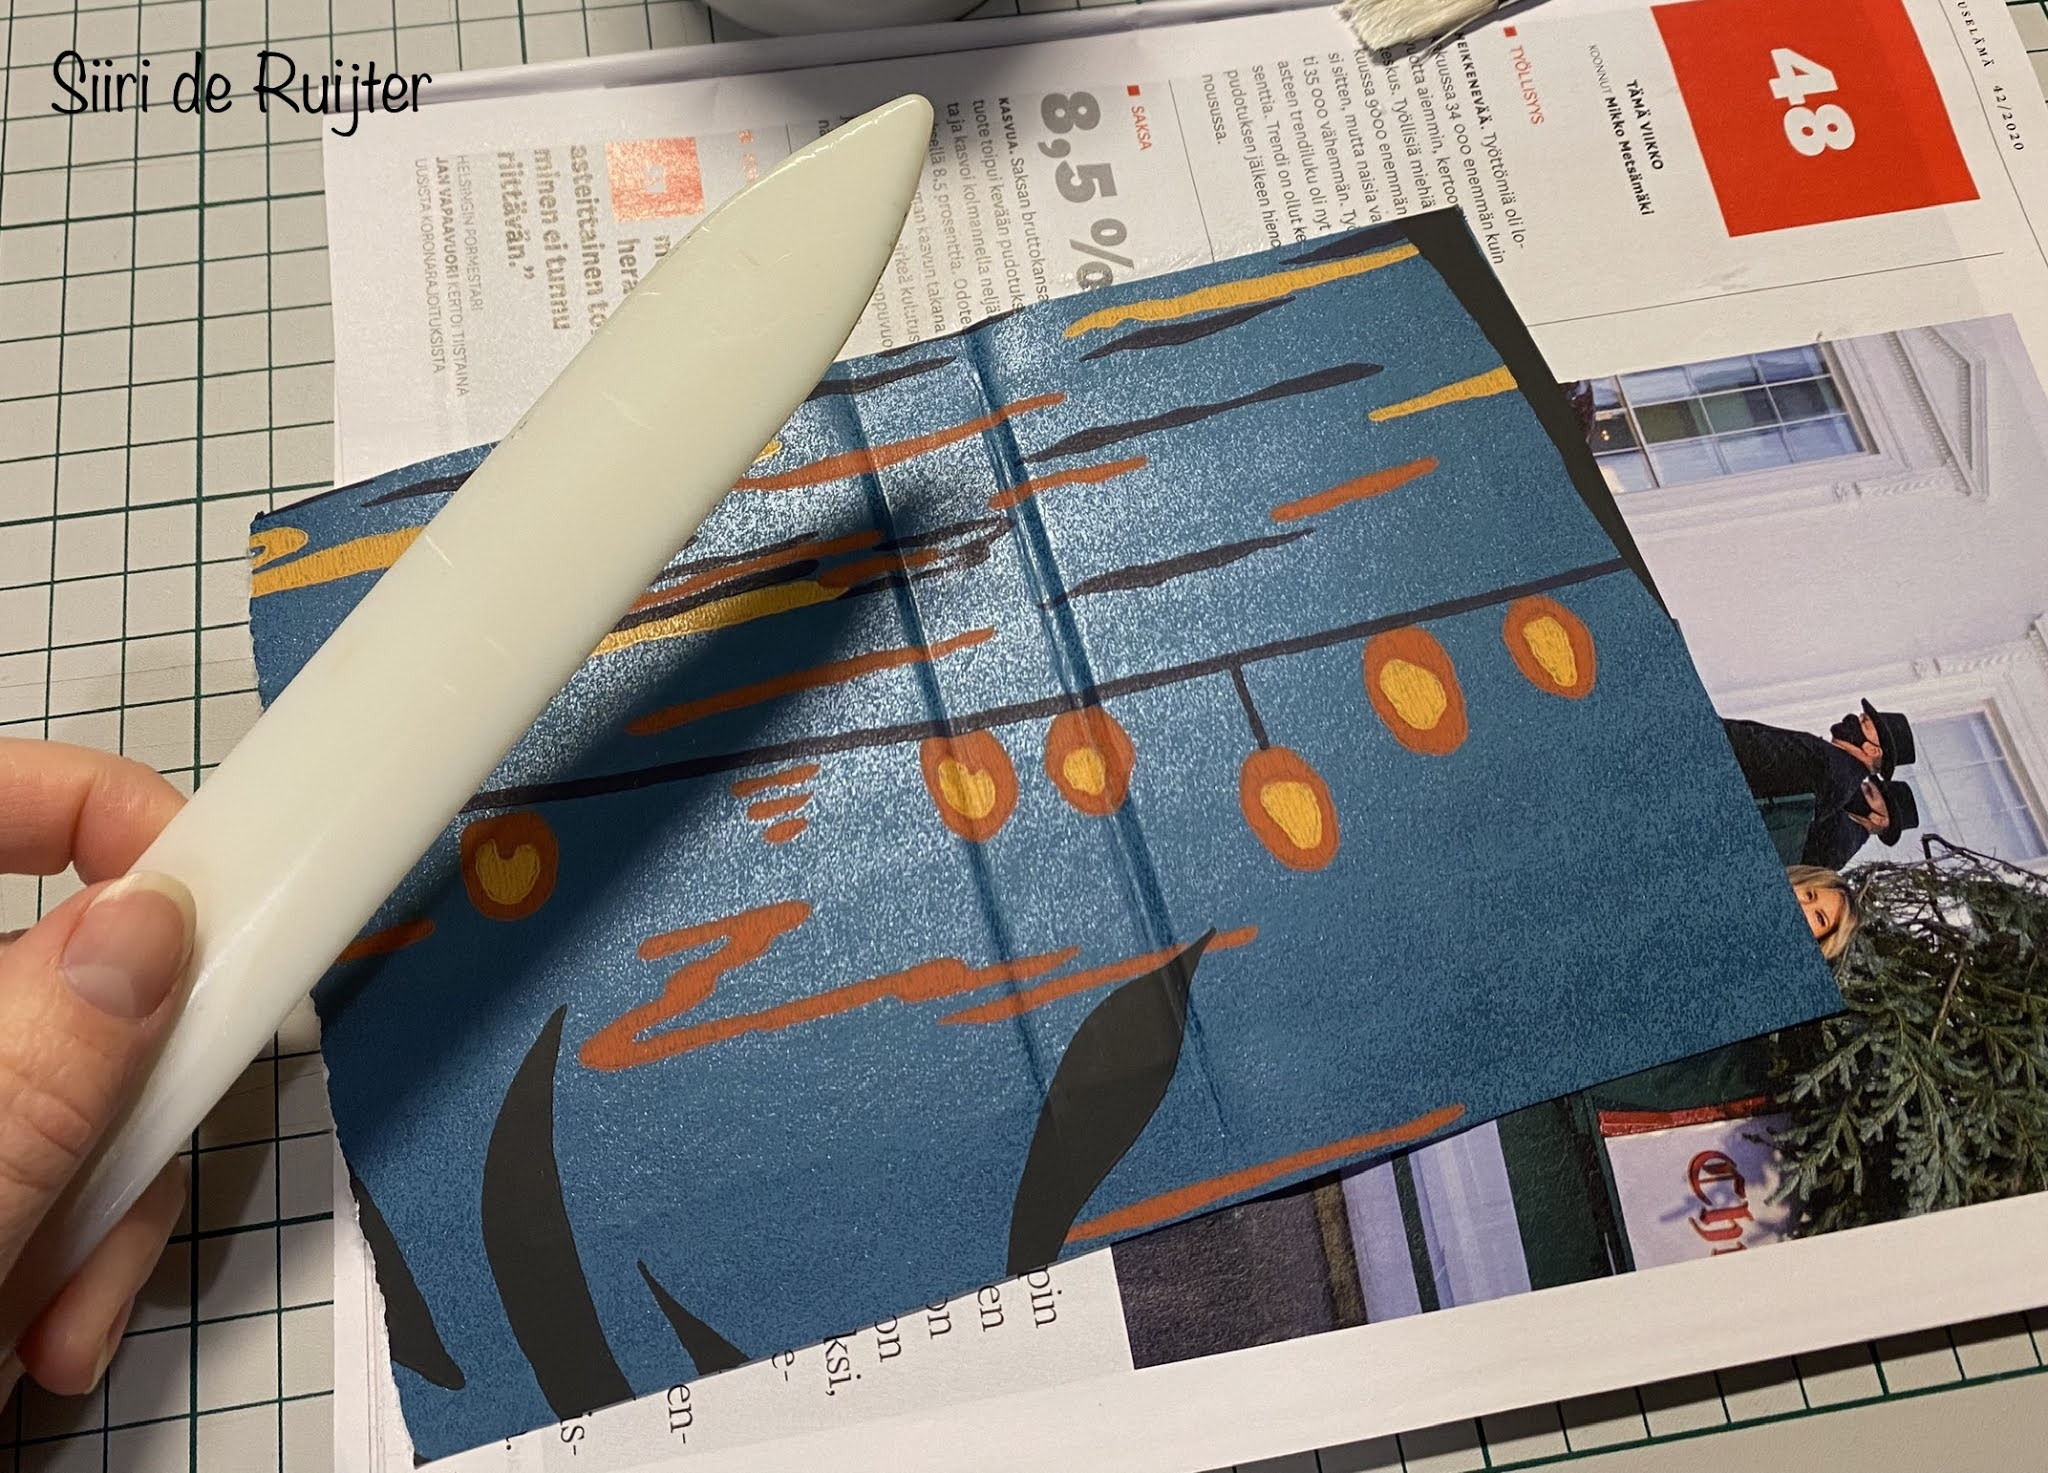
Cut a piece of fabric or paper that is much larger than the cover that you want to use for the book cover. The paper should not be too thick so it will fold well over the edges and not too thin so it won't tear when gluing. Fabric works well, I used fabric on my previous book. Now I used a piece of wallpaper. Apply glue to the cover (make sure you have the cover facing the right way) and attach your paper/fabric. Make sure that the cover paper is glued nicely. Again, you can use the bone folder. Make sure to press the paper properly on the back of the book.


Step 15

Once the outside of the book is glued, cut off the extra paper (about 1.5 cm is enough for the overhang) and a piece from each edge. Do not cut too close to the corner of the cardboard, but consider the thickness of the cardboard.


Step 16

Glue the paper on the inside of the cover. Again, use the bone folder to make sure the paper is properly attached. 


Step 17

You can cover the cardboard on the inside with a nice paper. Cut the paper to a suitable size. The height is the same as the pages (8.9 cm) and the width should be about 3 cm to cover enough.


Step 18

Cut two pieces of paper of the size 6,4 * 8,9 cm from another nice paper (or in my case here, wallpaper).

 
Step 19

Decide which way you want the paper and the inner cover papers. I wanted to keep the torn edges visible.


Step 20

Now you have your cover and the signatures as well as the extra paper.


Step 21

I have four papers in one signature. At this point, check that the order of the papers is to your liking. Now it can still be changed.


Step 22: Binding the book

Use the extra paper to help making holes on the cover. If you want, you can mark the locations of the holes first before making the holes with a bookbinding awl. You can also use another type of punch or sharp tool (eg. nails and a hammer). I have a some fabric as a cushion and a cutting board underneath. Make three rows of holes: one row for each signature.


Step 23

Next, the signatures get holes. Again, use the extra paper for this. Attach it to the signature with clips, if you want, so that it does not move while making the holes.  The four-page signature can be pierced at once with the awl. Thicker ones should be separated first.


Step 24

Next, the signatures are bound to the cover. I use bookbinding thread and a larger needle. Another type of thread (eg. embroidery thread) is also suitable for this, as long as it does not rip easily.


Step 25

This is how I bind my books (there are several ways to bind a book). This way, the knot is inside. Be sure to leave the thread long enough to make the knot in the end. You can keep the clips on the signature during binding, but be sure to remove the extra paper first.


Step 26

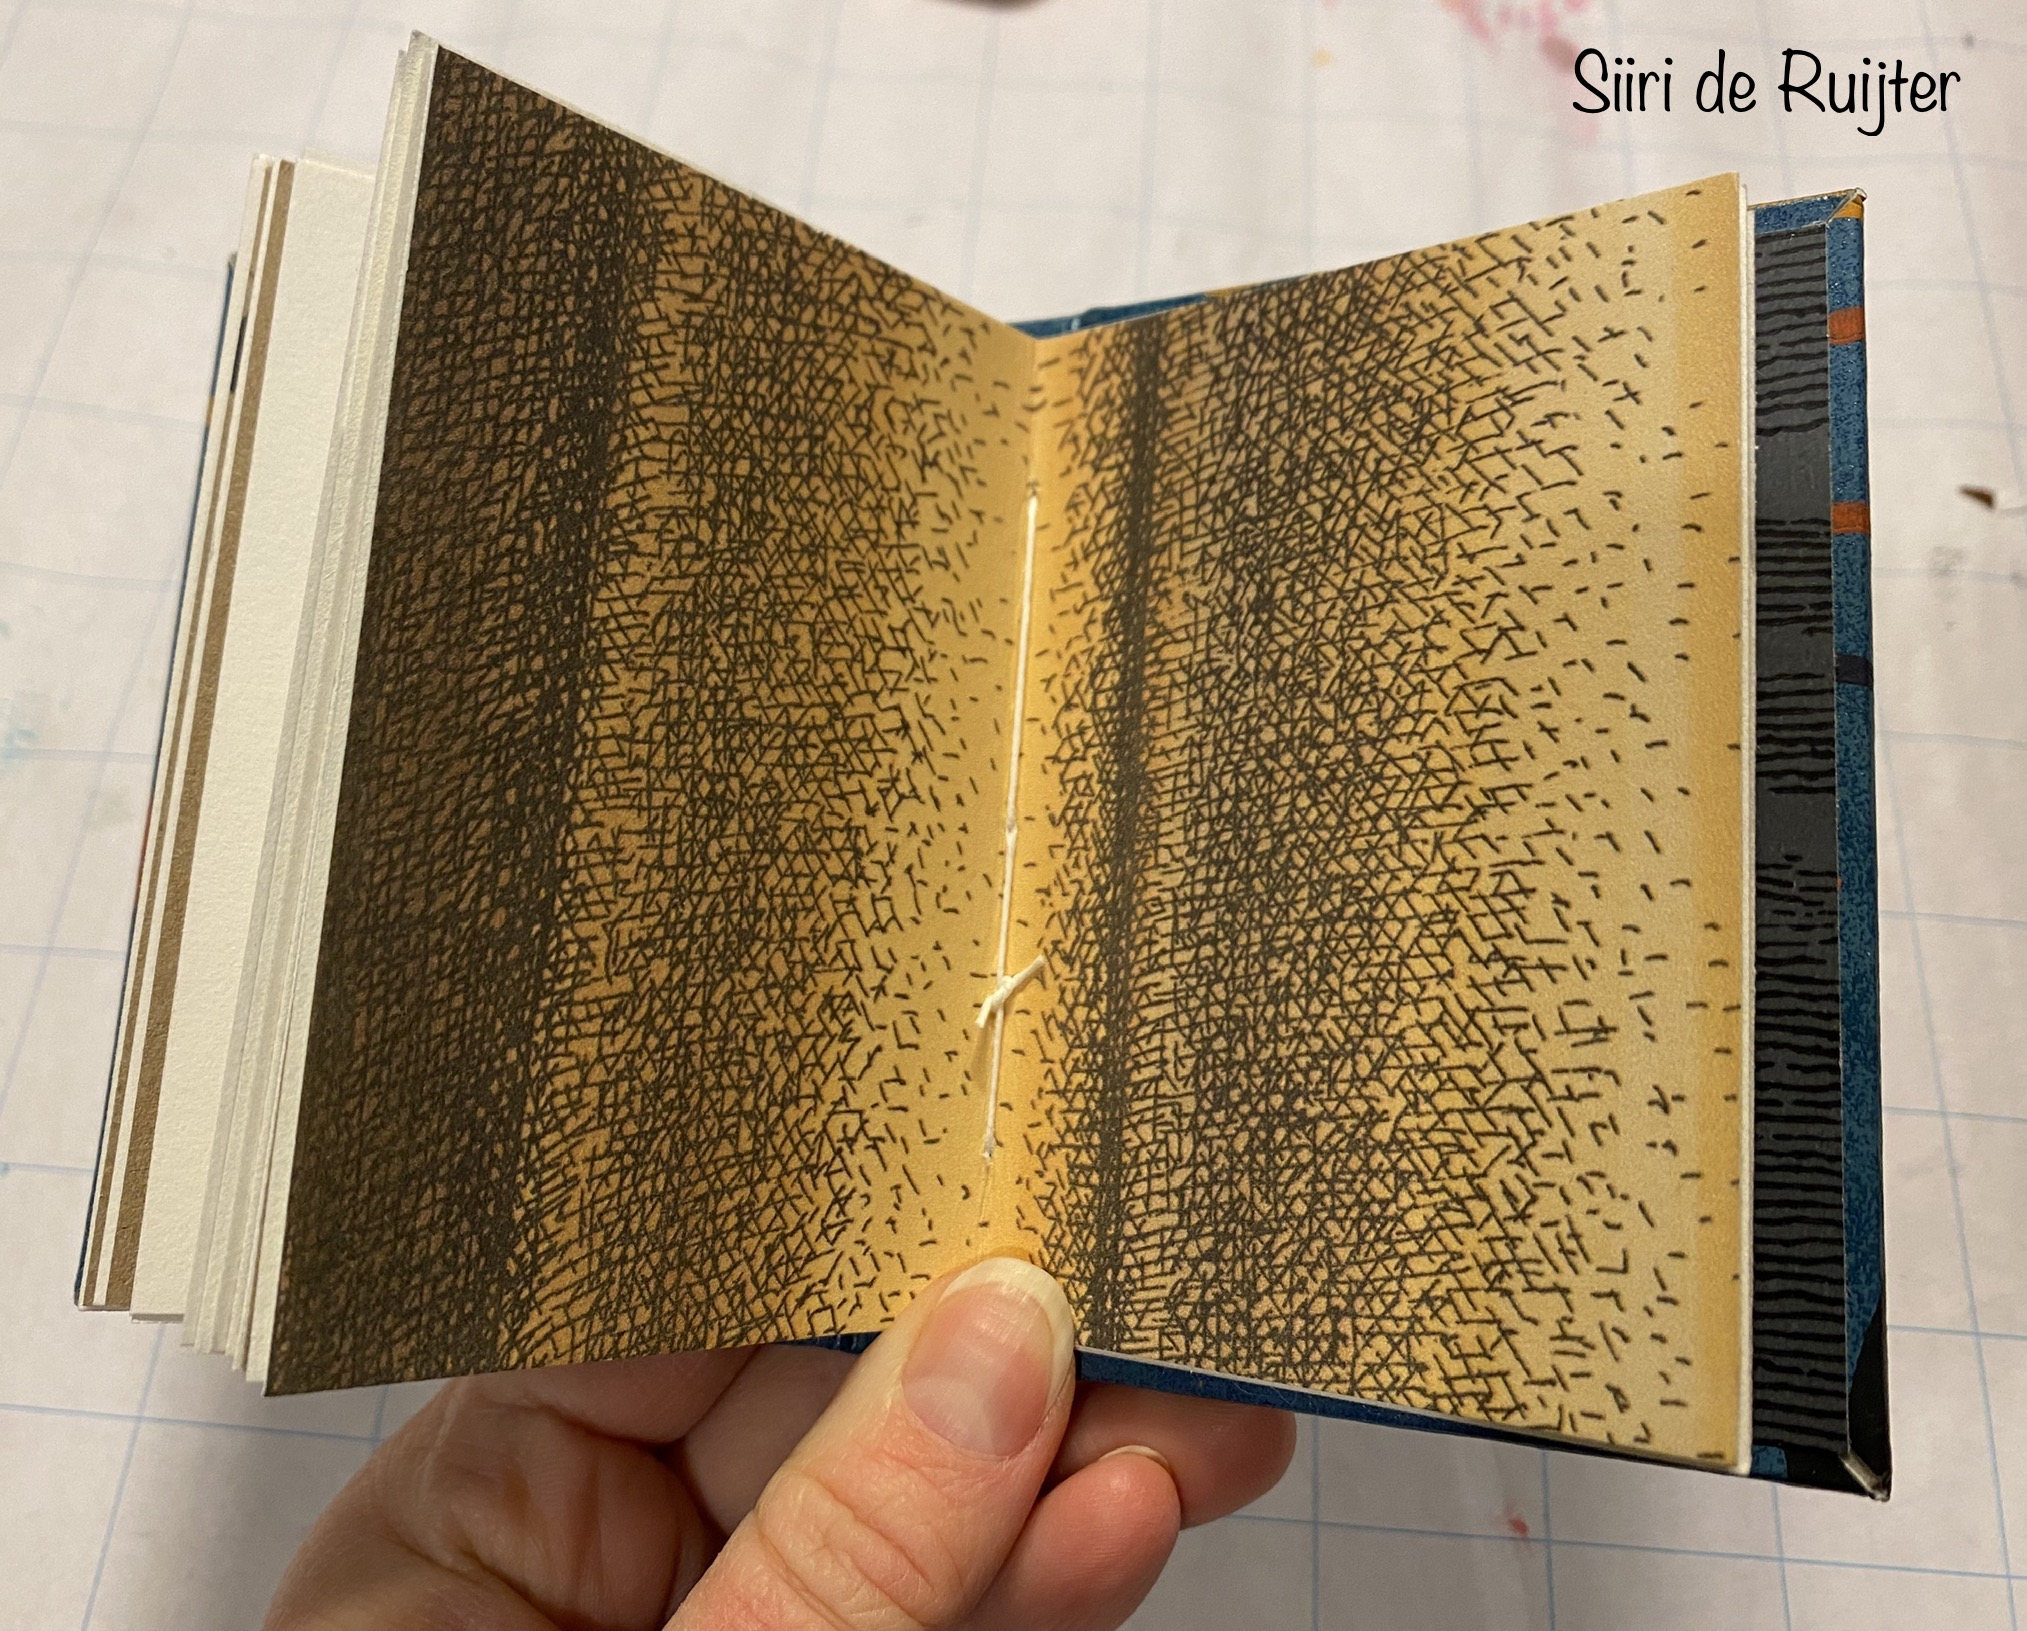
Tie a knot inside the signature. It’s good to use a friend's finger to help making the knot tight. Cut the excess thread. Repeat the binding for the other two signatures. 

Step 27

Your book is ready!


Extra step

I (always) make too many papers. Now I made them into a thin one-signature mini art journal. I cut a cover out of a nice paper that is a little bigger than the inside papers and tied it in the same way as the signatures to the cover of the book. This is an even easier way to make an art journal!


I hope these instructions were useful for you. Please feel free to ask if something was unclear. I'll gladly help. Book binding is awesome and addictive! :D

keskiviikko 20. tammikuuta 2021

Tutorial: Mini art journal (suomeksi)


The English instructions are coming!

Tein taas ATC-kokoisen minikirjan, koska ensimmäisen (tämän) sain jo täytettyä. Tämä pieni koko on tällä hetkellä mun lemppari. Vartissakin voi saada hienon sivun aikaiseksi ja lyhytkin taideterapiahetki auttaa. Alunperin tein tämänkokoisen kirjan, koska ATC-koko on hyvin inspiroiva, enkä aina välttämättä haluaisi tehdä korttia, joka menee vaihtoon, kun varastossa on jo useita kortteja. 

Minulta kysyttiin useampaan kertaan, miten tein oman kirjani ja päätin sitten tehdä ohjeet. Opin kurssilla perinteisen kirjansidonnan, mutta siinä sivut ovat liian lähekkäin omaa art journalointiani varten. Siksi tein tähän "löysemmän" sidonnan. Tykkään tehdä kirjani itse ja kokeilen koko ajan myös uusia tekniikoita. Monet kirjani olen tehnyt kuten tässä ohjeessa näytän. Teen vastaavasti myös monet suuremmista kirjoistani ja usein käytän myös vanhoja kirjan kansia. Pidän vanhoista kirjan kansista ja bonuksena saa art journal -kirjan paljon nopeammin valmiiksi. Kansia voi jälkikäteen halutessaan koristella lisää.

Tällä tavalla teen siis kirjani. Omasta mielestäni tämä on aika helppo tekniikka (varsinkin, kun käyttää valmiita kansia, eikä tee niitä itse). Mittaan mahdollisimman vähän, enkä ota niin tosissaan, jos joku ei olekaan ihan niinkuin piti. 

Muitakin tapoja on lähes yhtä monta kuin tekijää. Toivottavasti löydät oman tekniikkasi.


Tarvikkeet:
- papereita (kirjan sivuiksi)
- paperileikkuri tai vastaava
- taittoluu tai vastaava
- viivotin
- kynä 
- paksua pahvia (kansiin)
- ohuempaa pahvia (kirjan selkään)
- voimapaperia (kanteen)
- mattoveitsi
- kirjansidontaliima tai vastaava
- pensseli (liimalle)
- sakset
- paperia tai kangasta kanteen
- naskali tai vastaava
- leikkuulauta
- (klipsejä)
- kirjansidontalankaa tai vastaavaa
- neula


Vaihe 1: Sisäsivut

Aloita keräämällä sopiva määrä itsellesi sopivia papereita. Tässä kirjassa käytin tapettia, vanhaa toimiston riippukansiota ja valokuva-albumin sivua. Valitsen sellaisia sivuja, jotka ovat hieman paksumpia kuin peruskopiopaperi, mutteivät ole kuitenkaan ihan sitä 200 g vesiväripaperia. Valitse, mitä haluat itse käyttää - sehän on sinun kirjasi. 

Käytän sivuina lähes pelkästään kierrätyspaperia, koska 
- se on melkein aina täysin ilmaista
- ja siksi sen käyttämisellä omaan taiteiluun ei ole paineita 
- paperilla on valmiiksi joku oma historia (onko se löytynyt professorin vanhasta työhuoneesta, toimistomuuton jälkeen hylätyn huoneen lattian kasasta, kierrätyskeskuksesta...)


Vaihe 2

Leikkaa papereista sopivan kokoisia paloja esim. paperileikkurilla. Tähän ATC-kirjaan leikkasin 8,9 * 12,8 cm kokoisia paloja. Sisäpapereiden ei tarvitse olla kaikkien samankokoisia ja voi olla hyvinkin inspiroivaa käyttää erilaisia sivuja (kuten joskus teenkin, tässä esimerkki). 


Vaihe 3

Taita paperit keskeltä puoliksi. Käytin taittoluuta, mutta voit käyttää myös muuta vastaavaa työkalua. 


Vaihe 4

Jaa sivut vihoiksi. Minulla on tässä kolme vihkoa ja jokaisessa on neljä taitettua paperia.


Vaihe 5

Leikkaa ja taita yksi ylimääräinen sivu apupaperiksi rei'itystä varten. Käytän usein vanhaa lehteä tähän.


Vaihe 6

Merkkaa reikien paikat. Tämän voi tehdä joko viivoittimella mittaamalla tai näin taittamalla: Taitan apupaperin ensin keskeltä puoliksi. Näin pieneen kirjaan kolme reikää per vihko on sopiva määrä. Taitoin uloimmat reunat vähän sisäänpäin (noin 1 - 1,5 cm reunasta). Sitten avaa apupaperi ja merkkaa taitoksiin reikien paikat.


Vaihe 7: Kansi

Leikkaa paksusta pahvista kaksi 6,4 * 9,5 cm palaa. Leikkasin omani 2 mm konepahvista viivoittimella ja mattoveitsellä.


Vaihe 8

Leikkaa ohuemmasta pahvista (esim. muropaketin pahvi) 1,4 * noin 11 cm levynen pala. Tämä on kirjan selkä ja se tasoitetaan myöhemmin.


Vaihe 9

Leikkaa voimapaperista noin 6 * 11 cm kokoinen pala (tämä tasoitetaan lopuksi). Tähänkin sopii toinen paperi, kunhan se ei repeä helposti. Nyt sinulla on kaksi paksua kansipalaa, yksi kirjan selkäpala sekä voimapaperin pala.


Vaihe 10

Liimaa edellisessä vaiheessa leikattu kirjan selkä voimapaperiin kirjansidontaliimalla (tähän käy myös esim. nestemäisempi gel medium tai erikeepperi-liima). 


Vaihe 11

Seuraavaksi liimataan kirjan kannet. Ensin käännä voimapaperi, jotta kirjan selkä jää alapuolelle. Mittaa ja merkkaa viiva 5 mm poispäin selkäpalasta. Tee tämä molemmille puolille. Laita liimaa viivaan asti ja laita kirjan kansi kiinni. Käännä ja varmista (esim. taittoluulla), että paperi on tasaisesti kannessa kiinni. Liimaa vastaavasti myös toinen puoli. Jotta kansi tulee oikealle kohdalle, voi apuna käyttää viivotinta (alla oleva kuva).


Vaihe 12

Leikkaa ylimääräinen voimapaperi pois. Nyt sinulla on kansi lähes valmis. Sen ulkopuoli näyttää nyt tältä.


Ja sen sisäpuoli tältä.


Vaihe 13

Leikkaa reilusti kantta isompi pala kangasta tai paperia, jolla haluat päällystää kannen. Paperi ei saisi olla liian paksua, jotta se taittuu reunojen yli hyvin eikä liian ohutta, jottei se liimatessa repeä. Kangas toimii hyvin (edellisen kirjan kansi, täällä). Nyt laitoin kanteen tapetin palan. Laita kanteen liimaa (varmista, että sinulla on kansi oikein päin). Käännä kantta välillä ja varmista taittoluulla, että kansipaperi on tarttunut tasaisesti. Lisäksi paina taittoluulla kirjan selkä kunnolla paperiin.


Vaihe 14

Kun kirjan ulkopuoli on liimattu, leikkaa ylimääräiset paperit pois (yli meneväksi osaksi riittää noin 1,5 cm) ja jokaisesta reunasta pala. Älä leikkaa ihan pahvin nurkasta, vaan huomioi kansipahvin paksuus. 


Vaihe 15

Liimaa paperi sisäpuolelle. Varmista jälleen taittoluulla, että paperi liimaantuu tasaisesti.


Vaihe 16

Jotta kirjan selän sisäosa ei näy (ellei halua - sekin toimii), valitse hieno paperi ja leikkaa se sopivan kokoiseksi (korkeus on sama kuin sivuilla eli 8,9 cm ja leveyden pitää olla ainakin noin 3 cm, jotta se peittää tarpeeksi). 


Vaihe 17

Leikkaa kaksi palaa (6,4 * 8,9 cm) jostain toisesta kauniista paperista. 


Vaihe 18

Mieti, kummin päin haluat kirjan selän paperin ja sisäkansien paperit. Itse päädyin siihen, että selkäpaperi on päällä. Repäisty reuna oli liian hieno, että se peitettäisiin.


Vaihe 19: Kirjan sidonta

Nyt sinulla on vihot, apupaperi ja valmis kansi.


Vaihe 20

Minulla on neljä paperia yhdessä vihossa. Jos paperi on ohuempaa, niitä voi olla enemmänkin. Vihossa ei kannata olla liikaa papereita, ettei se tursua. Tarkista tässä vaiheessa, että papereiden järjestys on mieleisesi. Nyt sitä voi vielä vaihtaa. 


Vaihe 21

Käytä apupaperia apuna, kun teet reiät kanteen. Voit halutessasi merkata reikien paikat ensin ennen kuin teet reiät naskalilla. Tähän voi käyttää myös toisenlaista rei'itintä tai terävää välinettä (esim. naulat ja vasara). Minulla on alla pehmuketta ja leikkuulauta. Tee kolme riviä reikiä: yksi rivi yhdelle viholle. 


Vaihe 22

Seuraavaksi rei'itetään vihot. Käytä apupaperia ja kiinnitä se halutessasi vihkoon klipseillä, jotta se ei liiku rei'ityksen aikana. Tee naskalilla apupaperin läpi reiät vihkoon. Neljän sivun vihon voi rei'ittää kerralla. Paksumpia vihkoja pitää rei'ittää osissa.


Vaihe 23

Seuraavaksi vihot sidotaan kanteen kiinni. Käytän kirjansidontalankaa ja siihen sopivaa isohkoa neulaa. Tähän sopii myös toisenlainen lanka (esim. kirjontalanka), kunhan se ei katkea helposti.


Vaihe 24

Sidon kirjani tällä tavalla, jolloin solmu tulee sisäpuolelle. Muista sidonnassa jättää tarpeeksi pitkä pätkä vihon sisäpuolelle solmimista varten. Voit pitää klipsejä vihossa kiinni, kun sidot vihon kirjaan. Muista silloin poistaa apupaperi ensin. 


Vaihe 25

Solmi solmu vihon sisäpuolelle. Tässä on hyvä käyttää kaverin sormea apuna. Toista sidonta kaikille kolmelle viholle. Leikkaa ylimääräiset langanpätkät.


Vaihe 26

Kirja on valmis! 


Lisävaihe

Leikkaan joka kerta liikaa papereita. Nyt tein niistä ohuen vihkomaisen mini art journalin. Leikkasin siihen hienosta paperista kannen, joka on vähän isompi kuin sisäpaperi ja sidoin sen samalla tavalla kuin vihon kirjan kanteen. Tämä on vielä helpompi tapa tehdä art journal!


Toivottavasti tästä ohjeesta oli sinulle apua. Kysy toki, jos jotain kysyttävää jäi! Vastaan mielelläni.